Using Portainer and GitHub for Continuous Deployment

Portainer can be combined with a GitHub repo to allow for continuous deployment of docker swarm services, allowing all the benefits of Git to be applied to your stack files.
For those unfamiliar with the terms CI/CD or continuous integration and continuous deployment, they are terms for the automation of testing code and deploying code to production respectively. In particular, usually this is combined with Git so that as code is pushed to a central branch, a test suite will be ran against your changes and if it passes, the code will automatically be released as a new version. In team environments, this testing is usually done when opening a pull request (asking to merge your changes so that others can review it first).
This blog post only covers the deployment aspects that portainer provides, and doesn’t cover test suites which depend more on the language/framework you’re using, and what CI provider you’re using to run the tests (e.g. GitHub Actions, CircleCI, etc).
This post assumes that you have a Docker Swarm with portainer already setup, as well as a GitHub account. If you have yet to setup Portainer, see my blog post on How to Install Portainer.
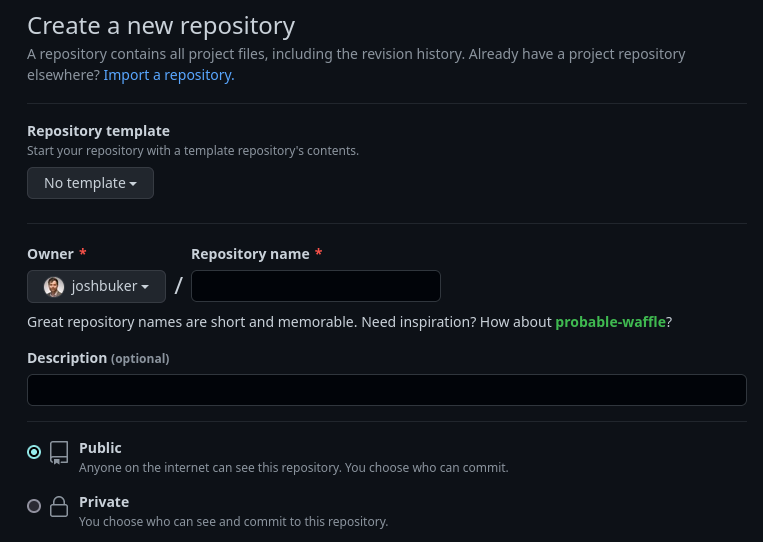
Create a new repository
You’ll want to create a new repo to contain your stack files. I recommend nesting each project / service in a folder. For an example of what this could look like, see my own repo at: https://github.com/joshbuker/homelab
Create a personal access token
You’ll need a personal access token to allow portainer to access GitHub as if it was you.
You can create a new fine-grained token by going to Settings -> Developer Settings -> Personal Access Tokens -> Fine-grained tokens (beta) -> Generate new token.
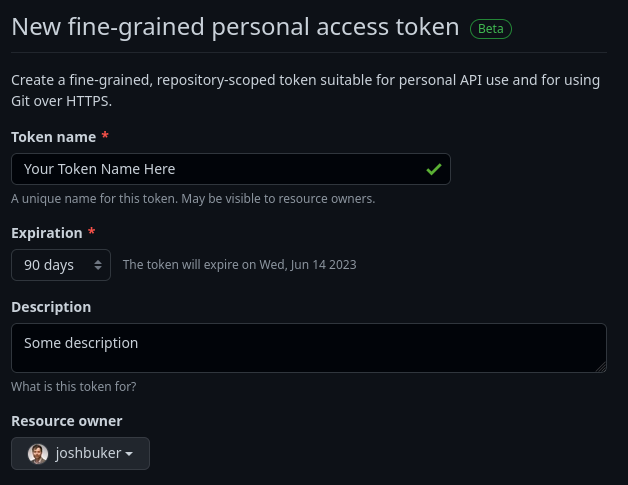
The token name can be whatever you want it to be, and for expiration 90 days is a reasonable compromise between convenience and risk.
You’ll want to ensure the personal access token is assigned to the relevant resouce owner (e.g. if you’re using an organization repo, set the resource owner to the org, not your personal account)
Set the Repository access to either Public Repositories if your repo is public, or Only select repositories if it’s private. If you set it to Only select repositories, then the only repository permission you need to add is Contents -> Read-Only
Save the token to your password manager of choice (if you don’t have one, consider 1Password or Bitwarden). Note that as soon as you refresh or leave the page, the token will disappear and need to be regenerated if you did not copy it.
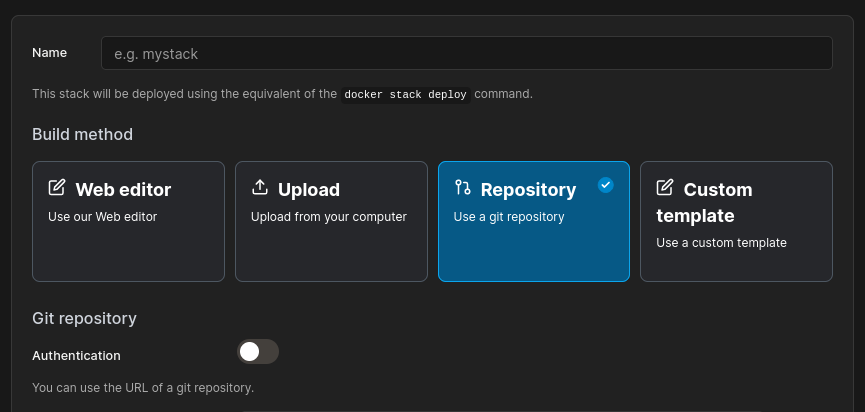
Create a new Portainer Stack using Repository mode
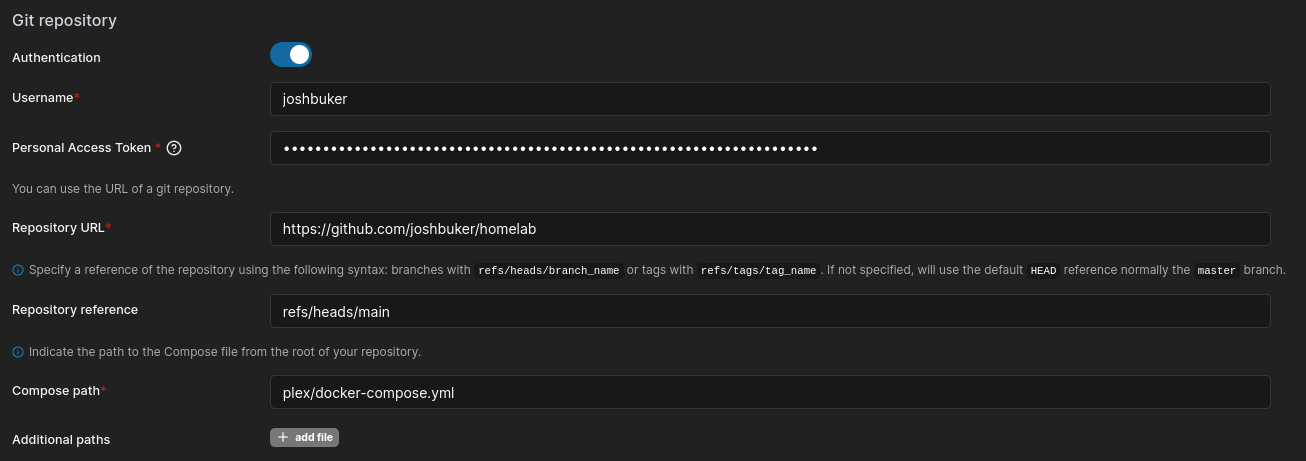
Enable authentication and use your GitHub username and the personal access token you just generated.
Set the Repo URL to the URL of the repo you created, and the repo reference to the branch you want to deploy from (typically refs/heads/main).
The compose path is the relative path of the stack file you want to use, for example: some-folder/my-docker-compose-file.yml
You’ll want to enable automatic updates. If using polling, set it to 24h (once daily) unless you know what you’re doing. You can always manually re-pull and redeploy if this polling interval is too slow for your use-case. You can also switch to webhooks if you would like to automatically push new versions immediately when committed, or after your test suite passes.
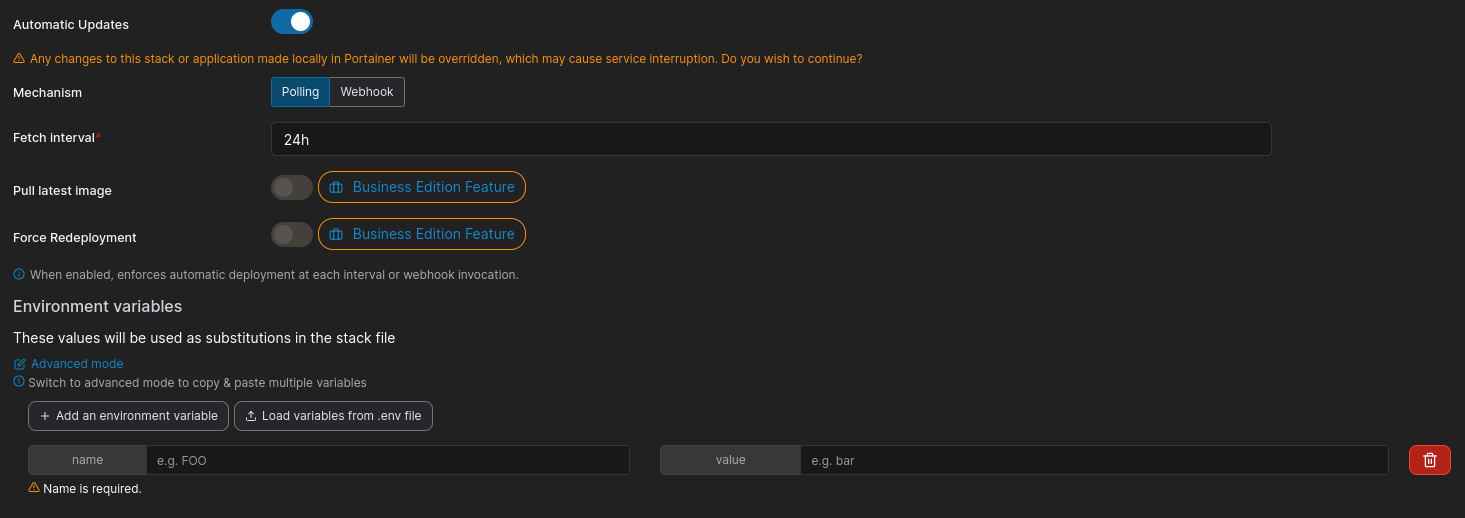
Using the webhook requires having a public IP that your service provider can reach, and some configuration on your GitHub repo. I’ll cover adding a test suite via GitHub Actions, and automated webhook deployments either in a future blog post, or as an update to this blog post.
Environment variables can be defined per stack, and allow for customizing/reusing stack files. For example, you can use this to set the IP and share name for NAS volumes.
Deploy the Stack, and you’re done!