How to Install NixOS
So you've heard about NixOS, and you want to give it a try. Let's get you started!
So you’ve heard about NixOS, and you want to give it a try. Let’s get you started!
Current as of NixOS 25.11, last updated on December 10th, 2025.
Requirements
- A host to install NixOS onto (can be either a computer or a Virtual Machine)
- A USB drive to host the installer ISO (If installing onto a computer and not a VM)
Installing NixOS
Step 1: Download the installation ISO
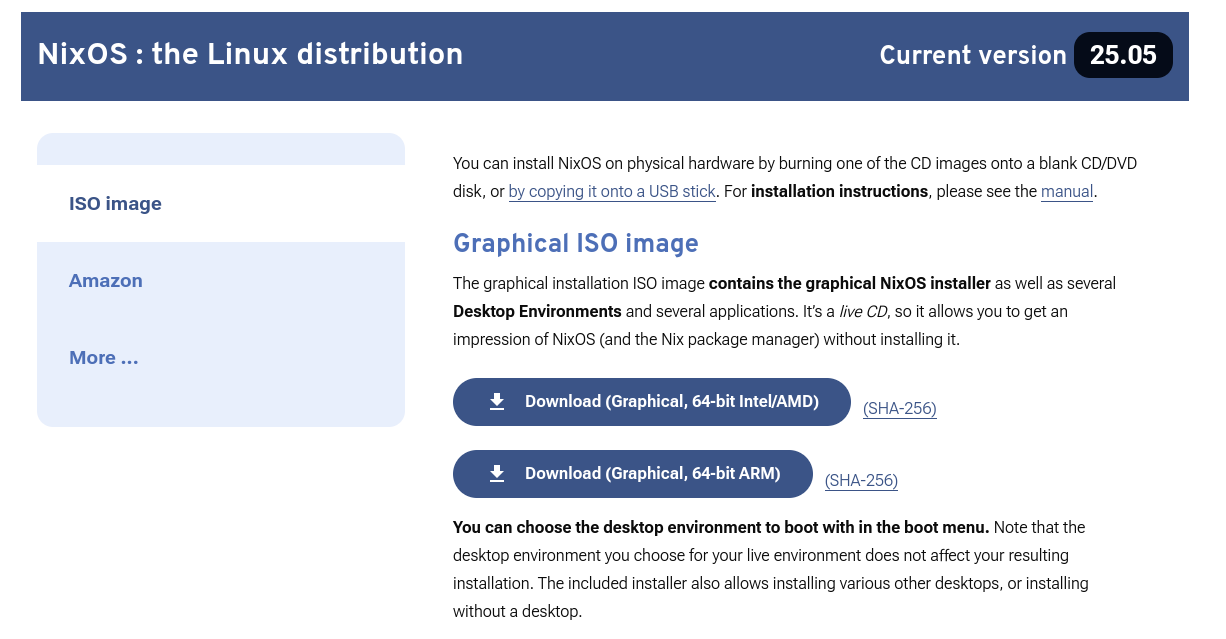
Download the latest Graphical installation ISO image: nixos.org/download.html#nixos-iso
 Scroll down to find the Graphical ISO Image Download
If all you see is the Nix Package Manager, and you can’t find the installation ISO, keep scrolling down. It’s below the fold and can be easy to miss.1
You will be able to choose which desktop environment you want to start with (e.g. Gnome, KDE, XFCE, etc) when going through the installation wizard process. If you don’t know what this is, just pick whatever one you like the look of when it asks you (it includes screenshots of each).
Step 2: Flash the ISO to a USB drive
If you are installing to a VM, instead of flashing the ISO to a installation USB you’ll want to provide the ISO directly to your VM manager. There should be a step where it asks you for the installation CD / media, which is when you’ll give it the NixOS ISO.
There are plenty of programs for creating a installation USB from a USB drive, and it doesn’t matter much which one you use.
- Balena Etcher
- Popsicle
- Rufus
- Your own favorite bootable USB creator…
Follow the instructions for the flashing program you chose to use.
Step 3: Reboot into the installation USB
You will want to find how to reboot into a bootable USB for your given hardware, or if using a VM, create a new image and give it the installation ISO when prompted.
Usually this means rebooting the computer, and pressing Escape, F2, Delete or some other function key (it should tell you for a brief second), then selecting one-time boot, and your USB drive.
If for whatever reason you do not get the installation wizard after booting into the USB, it’s possible that you switched an Nvidia laptop into dedicated GPU mode, and the installation ISO doesn’t have the Nvidia configuration needed by default to display properly. I would recommend switching to integrated graphics mode on your existing operating system until you can finish installing NixOS and configure your nvidia gpu properly.
I highly recommend enabling hard drive encryption when setting up the new disk partitions. It will help prevent someone from stealing your data if they gain access to your computer while unattended.
Follow the graphical installation process, and you should eventually be able to reboot into your brand new NixOS installation!
Recommended: Using a dotfiles repo instead of /etc/nixos/
Many videos and guides you’ll find will either provide dotfiles that you can try reusing, or recommend creating your own. However by default, NixOS will use /etc/nixos/, which is owned by root and difficult to setup a Git repository in.
I would recommend instead creating a dotfiles git repo to hold your configuration, and cloning it to ~/.dotfiles
Step 1: Create the repo
From GitHub (or your own preferred remote hosting Git service such as GitLab or Gittea), create a new repository. If you prefer, I have a template that you can use to get started: github.com/joshbuker/nixos-pop-shell-template2
Step 2: Clone the repo
Install Git by adding it to your system packages:
1
2
3
environment.systemPackages = [
  pkgs.git
];
Then clone your repository:
1
git clone {repo url} ~/.dotfiles
Step 3: Copy your configuration to the repo
https://github.com/joshbuker/nixos-pop-shell-template/tree/main/nixos/bootstrap#clean-up-and-switch-to-hosts
If using my Pop Shell template, you can now copy your current configuration to the dotfiles:
1
2
3
mkdir -p ~/.dotfiles/nixos/hosts/{hostname}
cp /etc/nixos/configuration.nix ~/.dotfiles/nixos/hosts/{hostname}/configuration.nix
cp /etc/nixos/hardware-configuration.nix ~/.dotfiles/nixos/hosts/{hostname}/hardware-configuration.nix
Step 4: Rebuild using your dotfiles moving forward
With Flakes (recommended)
1
sudo nixos-rebuild switch --flake ~/.dotfiles/nixos/#hostname
You can leave out the hostname when using flakes, and it will use your current hostname by default. For example:
If you are using my template, it will use home manager to install some aliases, including one for running a rebuild script that includes the above command.
1
rebuild
Without Flakes
You can also rebuild without flakes, using a slightly different command.
1
sudo nixos-rebuild switch -I nixos-config=/home/{username}/.dotfiles/nixos/hosts/{hostname}/configuration.nix
1
2
3
{
  nix.nixPath = [ "nixos-config=/home/{username}/.dotfiles/nixos/hosts/{hostname}/configuration.nix" ];
}
Replace {username} with the username of the user you will be rebuilding NixOS with and {hostname} with the hostname of your current machine.
