Free Photography Hosting with Cloudflare Pages

As a photographer, I’ve been contemplating various methods of posting my photos online. There’s some social media options such as PixelFed or Instagram, but I’ve done a relatively good job avoiding social media, and there are other issues such as loss of copyright when posting to such platforms.
So, as any good developer does, I decided to stick my photos into Git and automate everything with a CI/CD pipeline instead.
My stack looks like:
- Git - Versioning control
- ThumbsUp - Static website generator
- GitHub - CI/CD when integrated with…
- Cloudflare Pages - Free serverless hosting
My total hosting bill? $0.00/mo
How to host your own gallery for free
You’ll need a few things before you get started:
- A GitHub Account
- A Cloudflare Account
- A Domain Name1
Creating a GitHub Account
Creating a GitHub account is simple and free, do so at: github.com/signup
Creating a Cloudflare Account
Creating a Cloudflare account is also free, sign up at: dash.cloudflare.com/sign-up
Buying a Domain Name
Now, this part is not free, but you can do a lot with your domain name beyond just hosting your photography if you so choose. For example, I host my photography at photography.joshbuker.com, while joshbuker.com is a completely separate website using another static website generator called Jekyll.
This can be the hardest part of the process for some…deciding on a good name. When in doubt, and if it’s available, <firstname><lastname>.com is a solid bet. It’s flexible, easy to remember, and unless you have a common name it’s also usually available for purchase.
Something else to consider, are alternative top-level domains, such as .photos, .photography, and others. For example, you could get <firstname><lastname>.photography if you only plan on hosting your photography with the domain name.
There are many domain registrars that you can purchase your domain name through, including Cloudflare. Personally, I highly recommend Gandi.net, who actively supported net neutrality and offer excellent service.2 I also would strongly encourage avoiding GoDaddy like the plague. Beyond that, most services like namecheap, google domains, etc, are all decent options. It’s really up to you on who to use and trust.
Whatever registrar you use, you should be able to follow along to the rest of this guide, just replacing the DNS step with whatever your registrar’s equivalent settings pages are.
Putting it all together
Now that you have a domain name, and an account on GitHub and Cloudflare, it’s time to put it all together.
Creating a Git repository
You can use my premade template here: github.com/joshbuker/photography-template/generate
For more guidance on how to use Git, I’ll be creating another blog post in the future specifically covering the topic.
Using Cloudflare Pages
Now that you have a GitHub repo with your photography website code and content, you’re ready to start using Cloudflare pages. From your account, go to the pages section from the menu:
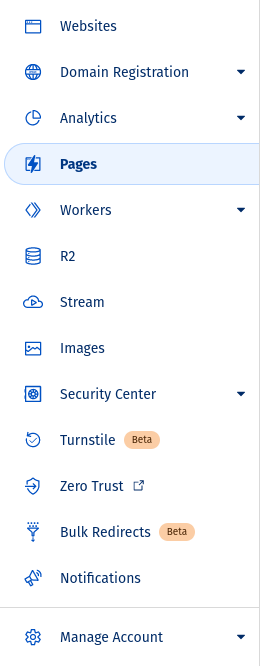
You’ll want to create a new project, connected to Git.
Authenticate to your GitHub account, ensuring to grant permission to the repo you just created. Then select that repository and click Begin setup.
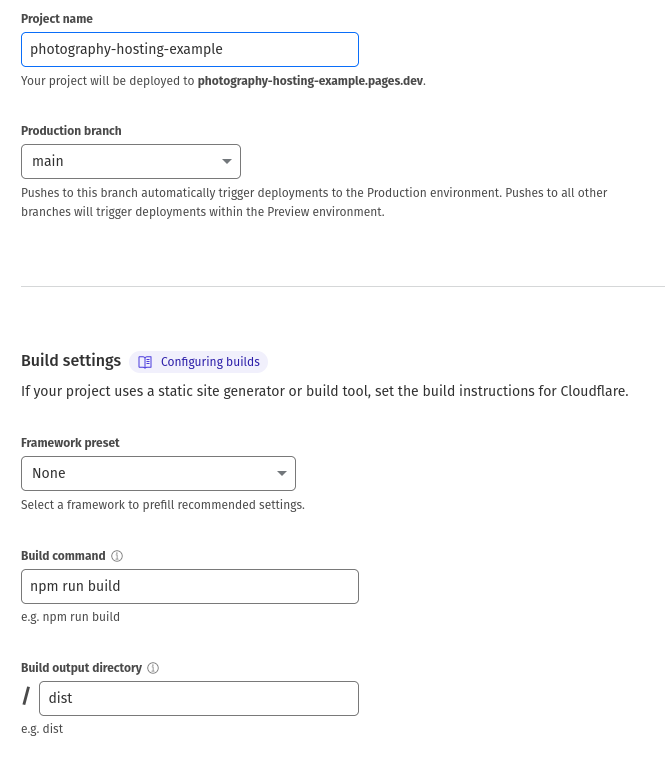
For the build settings, you’ll want to use the following configuration:
- Build command:
npm run build - Build output directory:
dist
Everything else can be left default.
You are now ready to save and deploy! You can watch the build process, which usually takes about 1-3 minutes. Alternatively, you can go straight to the project settings while it builds, as you do not need to remain on the page for it to finish building.
Using your custom domain name
Almost done! There’s just one more step, using your custom domain.
From the project settings, go to the Custom domains tab, and add the domain name from earlier. My personal website was already configured with Cloudflare, but if you’re using something other than Cloudflare for your domain registration, you will need to update the DNS nameservers to use Cloudflare’s nameservers instead.
And with that, you’re all set! Any time you want to update your galleries, simply update the photos folder and push up to GitHub. Cloudflare will automatically detect the changes and redeploy your website.
Technically the domain name isn’t free, but it’s around $16/year or less, and can be used for far more than just your photography. It’s also optional, and if you really can’t afford a domain name, you can just share the automatically generated cloudflare pages domain instead. ↩︎
Update (December 10th, 2025): Since having been bought by Total Webhosting Solutions, Gandi rapidly enshittified, drastically increasing their pricing and removing previous functionality. Unfortunately, it seems they were a victim of private equity, and are no longer worth using or supporting. These days, I recommend Cloudflare and Porkbun instead. ↩︎